Saturday, 20 August 2022

Going Around in Circles


Welcome
Today's card features a print I did using my Gel Plate.
This Dot Circle stencil from A Colorful Life Designs has become a favourite.

So here's what I did to create my card.
  • I began by getting out my Gel Plate, brayer, Dot Circle stencil and some blue acrylic paint.
  • I added paint to the plate, brayered it nice and smooth, then placed the stencil over the wet paint.
  • Using the end of a paint brush handle, I gently pushed the stencil onto the plate, making sure it had really good contact.  
  • Next, I rubbed a piece of paper over stencil that was still on the plate which helped lift some off some of the paint.
  • I took the stencil off carefully, then rubbed a piece of white cardstock to get this print.  I set it aside to dry completely.
  • I got out this birthday die and cut the letters from some white cardstock. 
  • I cut the shadow die for the sentiment right from the center area of the print and then glued the Happy Birthday onto that.
  • I glued the Gel Plate print to a piece of white cardstock, then onto an A2 card base.
  • I pop dotted the sentiment by fitting it back into place in the center.
  • I added 3 silver gems to finish off my card.

Here is the stencil I used:
Dot Circle

Discount Code for A Colorful Life Designs
(affiliate with no extra cost to you)

Thanks so much for coming by and taking a look.

Supplies
Stamps- none
Inks- Basics Acrylic paint
Paper- heavy white (Scribes Nook- Waterloo, Ont.)
Accessories and Tools- stencil (ACLD); Gel Plate; Speedball brayer; silver gems (Dollar Tree);
Happy Birthday die (Amazon); paint brush

Friday, 12 August 2022

Fancy Fold


Good Morning
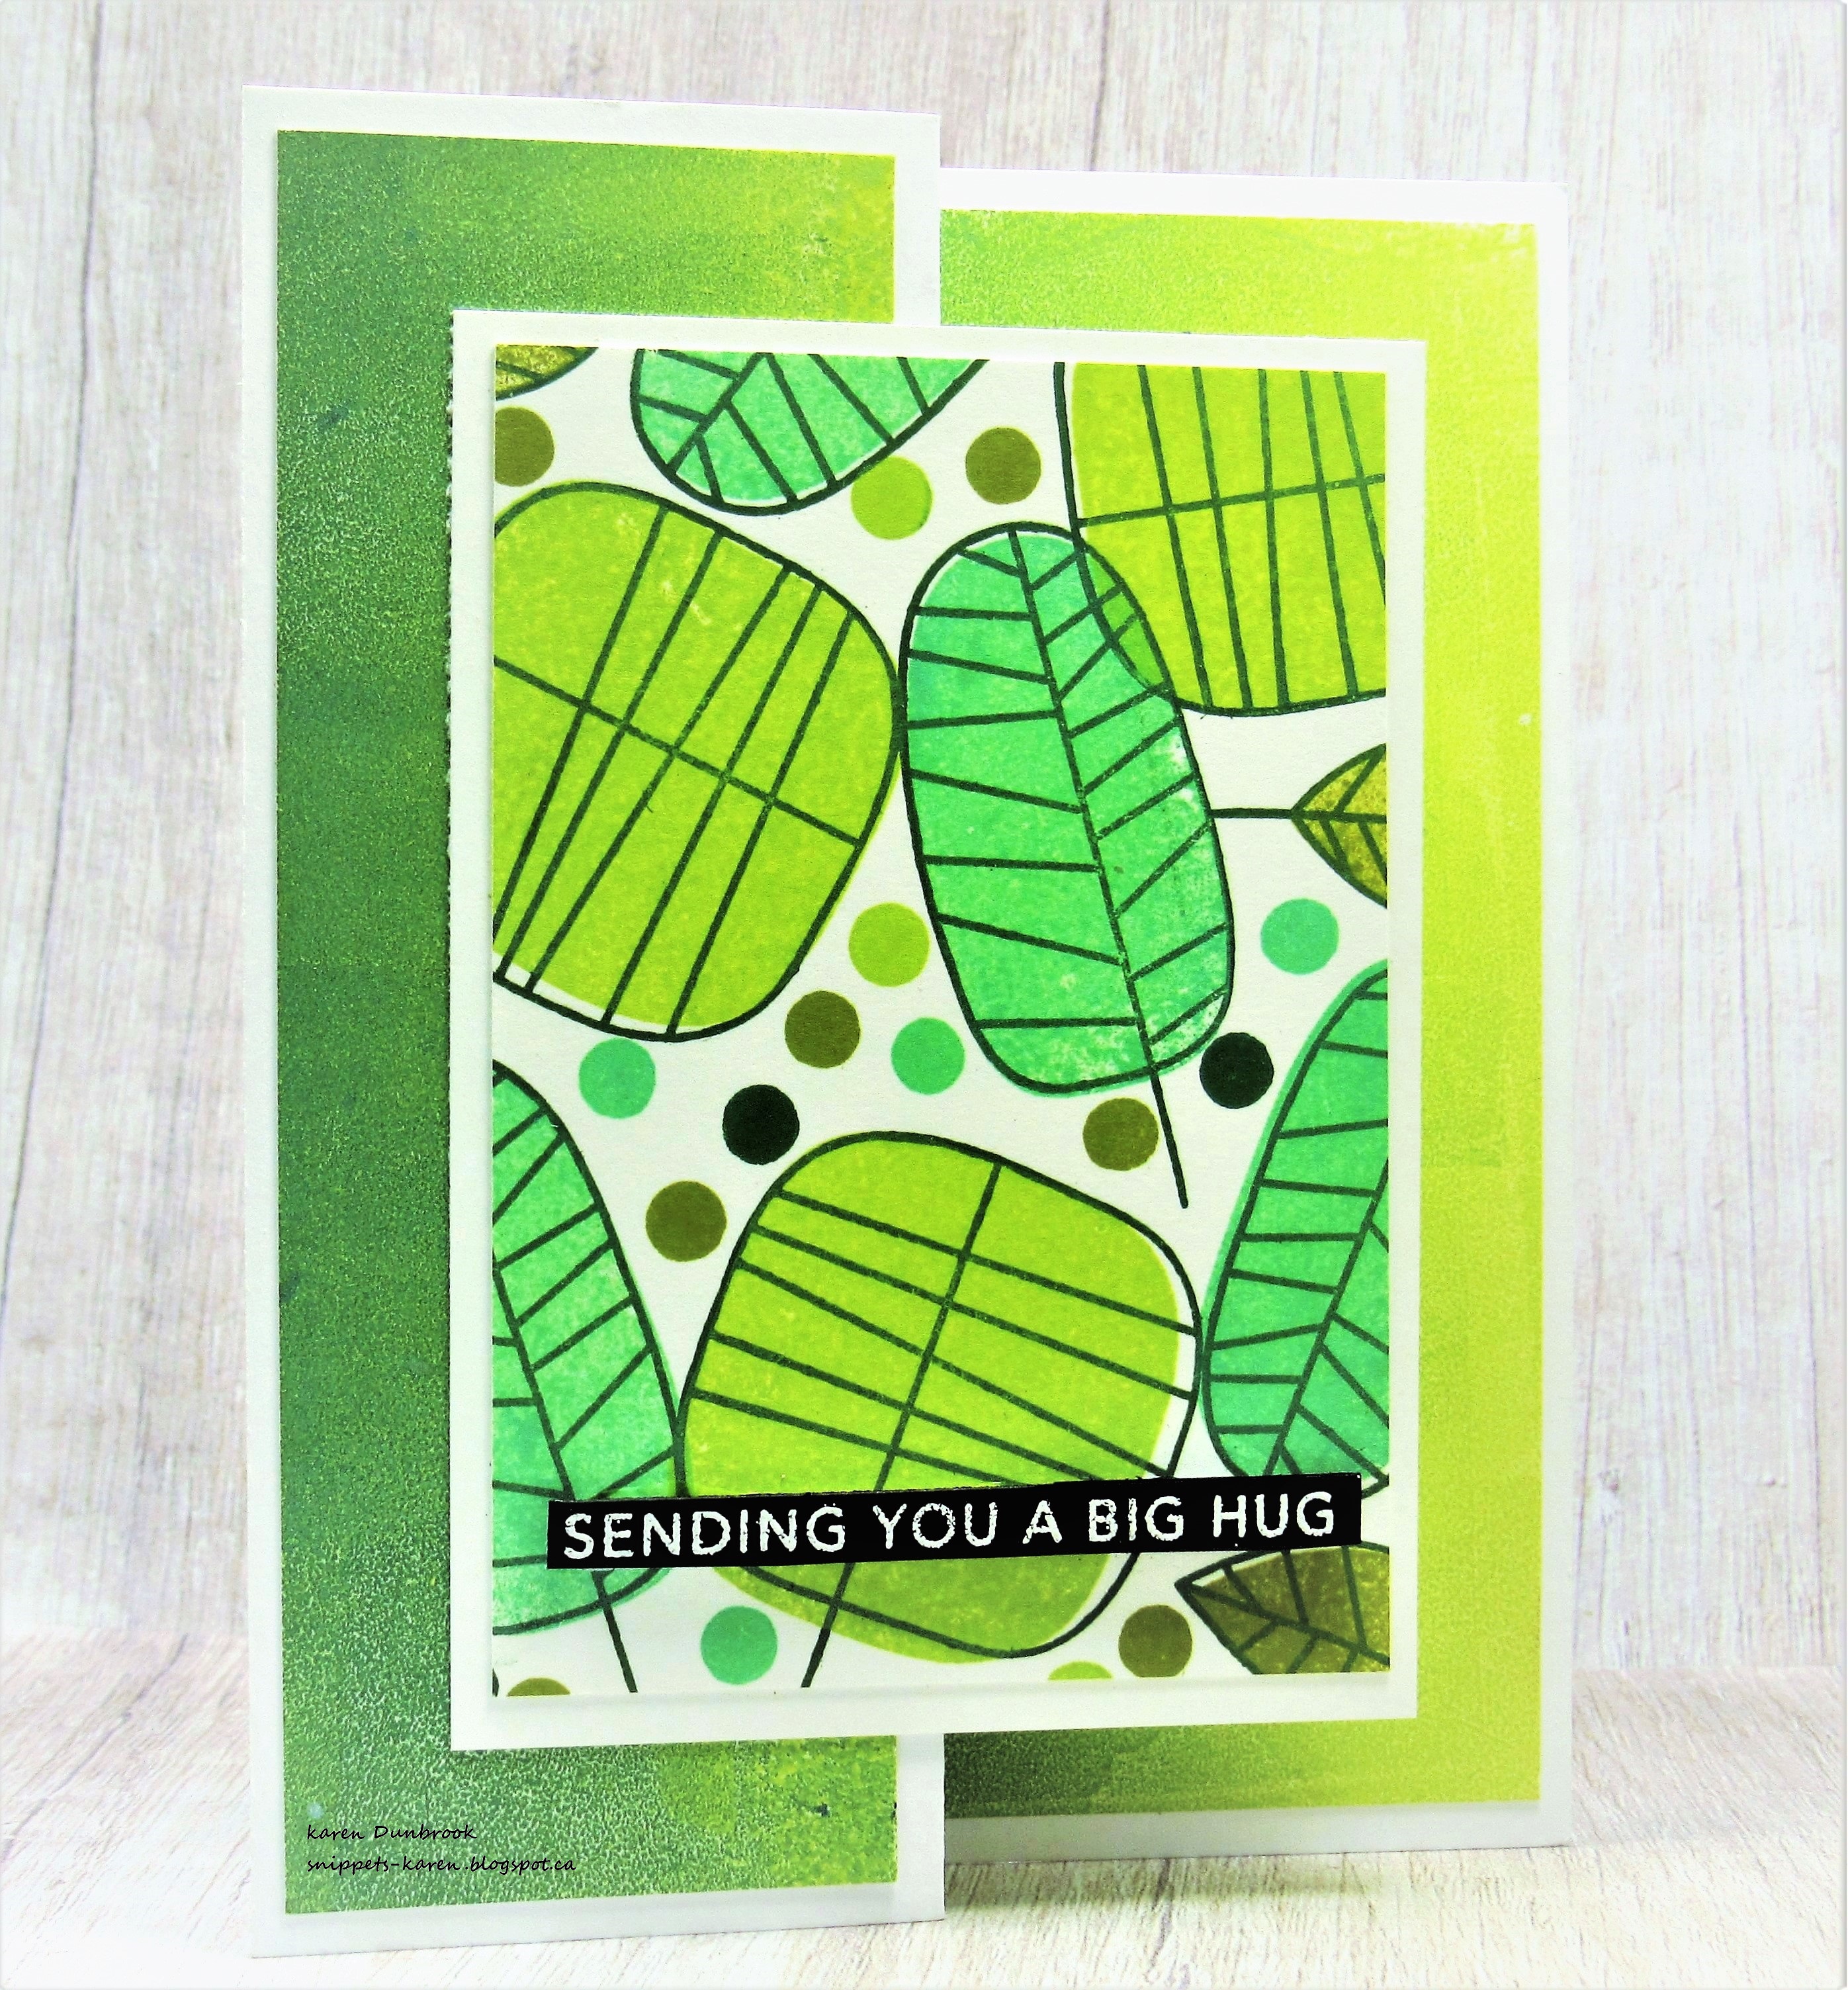
Today's card is a 'Z' fold design.  
It is fun to change it up now and again and this fold is not complicated at all to do.

So here's what I did to create my card.
  • I began by getting my card base ready, a standard A2 size card base that was 5 1/2 x 4 1/4" when folded.  I scored and folded the front side panel in half. It creates a 'Z' fold card. Next, I went in search of the papers I wanted to use and cut them to size to create the back and front pieces.
  • I found this green print that I had done with Distress Oxide inks on my Gel Plate...I don't know what colours I used so I'm going to guess...Twisted Citron, Peeled Paint.  I just rub the ink pad directly onto the plate, use a brayer to smooth it out and then press my paper over to lift the print.
  • I took another piece of white cardstock, placed it into my Misti and randomly stamped the leaves from the Many Thanks set.  This set is a 2 part so I used the same colours as above to fill them in.
  • There was still a lot of white space so I used the end of a pencil eraser to add the dots.  The finished size of this panel was 4 x 3 1/4".
  • I glued the leaves panel onto a piece of white cardstock, then onto the front fold of my card. **Be sure to just add glue to the left hand side of the panel you are adding so the right side is not glued and your card will open. **
  • I stamped the sentiment onto some black cardstock using some Versamark ink and white heat embossed it.  I popped that over the leaves.

Here is what the card looks like open.
(my brayering wasn't the best!)

Thanks so much for coming by and taking a look.


Supplies
Stamps- Everyday Sentiment strips (TE); Many Thanks (SSS)
Inks- Versamark, DOX
Paper- heavy white (Scribes Nook- Waterloo, Ont.)
Accessories and Tools- white embossing powder (Lawn Fawn); foam tape; ScorPal; 
Misti (My Sweet Petunia); Gel Plate; Speedball Brayer; heat tool

Thursday, 11 August 2022

Polar Bear Pal


Hello and Welcome
Meet today's card that I used a combination of a stencil and stamping.
Another one to have on hand to send out for the holidays.

So here's what I did to create my card.
  • I began by cutting a piece of white cardstock, then placed that onto my Make Art Station. 
  • I positioned the Cozy Knit stencil from A Colorful Life Designs over my paper and inked it up with some Peacock Feathers Distress Oxide ink.
  • Next, I pulled out this fun Snowflake Turnabout stamp and positioned it into my Misti over my stenciled cardstock panel.  For those of you that are not familiar with the Turnabout stamps, you ink, turn your paper and ink again until you have turned your paper and stamped on all sides.  A stamp positioner is most helpful when using this type of stamp. I inked it up with some Peacock Feathers DOX ink and stamped.  
  • I turned my paper, cleaned off my stamp and inked again with some Blueprint Sketch and stamped.
  • I repeated that step 2 more times using some Dusty Concord and some Wilted Violet DOX ink.
  • Using a circle die, I cut a circle from the center of my finished panel and set aside.
  • I die cut a slightly larger circle from some white cardstock and glued the two circles together.
  • I stamped the Polar bear onto a piece of white cardstock, then used some diluted DOX ink (same colours as used in the background) and painted in the bear's scarf.
  • I added a slight hint of colour on his fur using a Copic marker and then fussy cut it out.
  • I stamped the sentiment from the same set and then tore the top of the paper to look like snow.  I rubbed a bit of ink along the edge as well.
  • I trimmed the torn paper to fit over the stenciled-inked die cut circle and glued them together.
  • I pop dotted the bear at the top of the circle over the torn edge and then pop dotted the whole larger circle back into place, matching it up with the background.
  • I added it onto an A2 size card panel.

Here is the stencil I used:

Discount Code for A Colorful Life Designs
(affiliate with no extra cost to you)

Adding my card to these challenges:
Krafty Chicks- CHRISTMAS
Time Out- MAKE YOUR OWN BKG

Supplies
Stamps- Snowflake Turnabout (Concord and 9th); Polar Bear Pals (MFT)
Inks- Versafine Clair, DOX, Copic marker
Paper- white (Scribes Nook- Waterloo, Ont.)
Accessories and Tools- Cozy Knit stencil (ACLD); Make Art Station (Ranger);
TE Blending Brushes; Infinity Circle dies (HA); Misti (My Sweet Petunia)

Wednesday, 10 August 2022

Dragonfly Dreams


Welcome
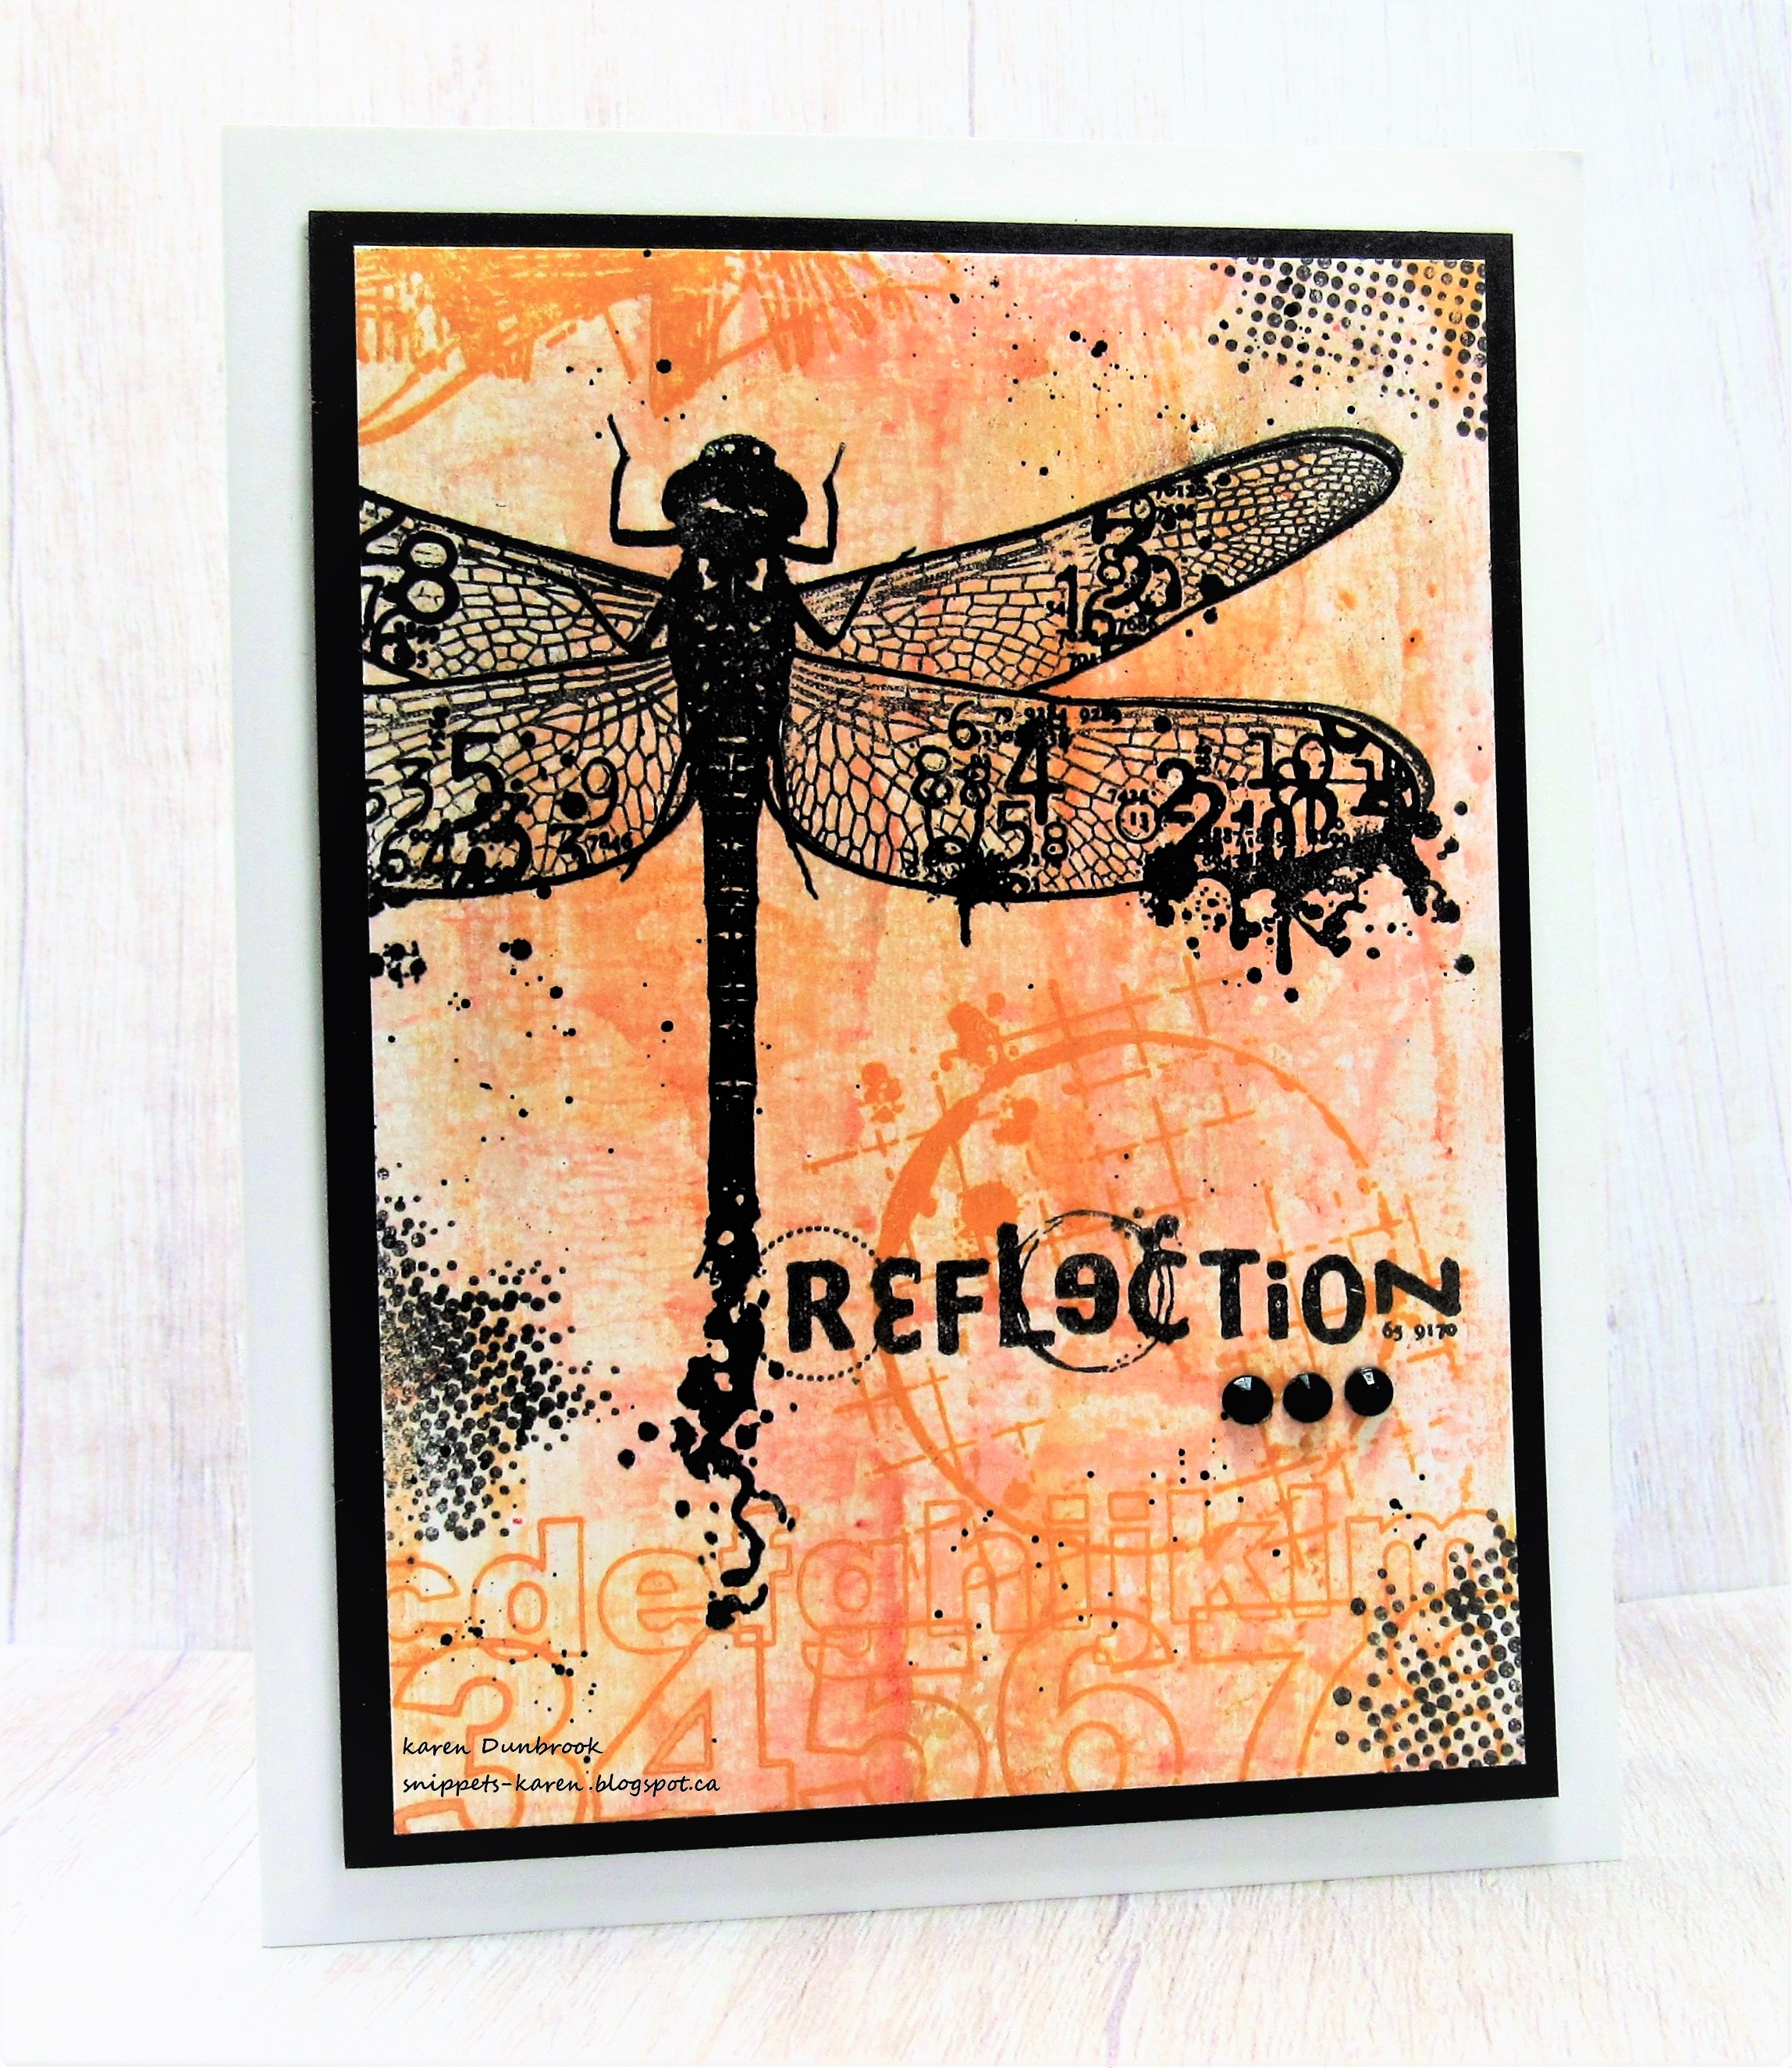
Today's card features a collage style, using this lovely dragonfly from Visible Image.

So here's what I did to create my card.
  • I cut a white cardstock panel and inked it up with my brayer again.  I rolled my brayer onto some Carved Pumpkin Distress Oxide ink, sprayed with water and rolled onto my paper.
  • I repeated that process using some Dried Marigold DOX ink until I was happy with the coverage of ink.
  • I stamped the dragonfly over to one side with black Versafine ink in my Misti.
  • I stamped the black dots in the corners and side using Grunge Tones and more black ink.
  • I stamped the details and the numbers with some more Carved Pumpkin DOX ink so it blended into the background.
  • I splattered with my black Posca pen.
  • I glued the finished panel onto a piece of black cardstock, then onto a white A2 size card.
  • Finally, I added 3 black gems just under the sentiment.

Thanks so much for coming by and taking a look.

Adding my card to these challenges:
Cardz 4 Guyz- DISTRESS AND GRUNGE 
We Love Stamping- IN MY GARDEN

Supplies
Stamps-Dragonfly Reflections; Grunge Tones (Visible Image); Arty Alphas (Paper Rose)
Inks- Versafine Clair, DOX
Paper- heavy white- Scribes Nook, Waterloo, Ont.
Accessories and Tools- Misti (My Sweet Petunia); Speedball Brayer; black Posca pen; 
black gems

Tuesday, 9 August 2022

Simple Stamping


Good Morning
If you are a stamper or card maker, you get it.
It is the middle of summer but if you send out cards for Christmas, we need to start well in advance creating them before all the hustle and bustle the holidays bring, are upon us.

Today's card is done with some simple stamping.  I picked up this Ornamental Pine set recently.  
It's an older one I've admired for a long time and a great one for the holidays.

So here's what I did to create my card.
  • I began by looking through my stash of inked backgrounds.  I found this one done as I rolled the ink off my brayer.  To get the hint of a design in the background with the Blueprint Sketch Distress Oxide ink, I sprayed the brayer with water before rolling it onto the paper.
  • I placed the inked panel into my Misti and stamped the tree boughs near the top and the sentiment from the same set, near the bottom.
  • To give it a wintery look, I splattered with my white Posca pen.
  • I glued it onto a piece of white cardstock, then onto an A2 card base.

Thanks so much for coming by and taking a look.

Adding my card to these challenges:
Simon Says Monday- SPRITZ AND SPLATTER
(my son and I go and cut evergreen boughs every yr to fill our urns)


Supplies
Stamps- Ornamental Pine (SU)
Inks- Versafine Clair, DOX
Paper- heavy white (Scribes Nook, Waterloo, Ont.)
Accessories and Tools- Misti (My Sweet Petunia); white Posca pen; Speedball Brayer

Saturday, 6 August 2022

Relax


Good Morning
This simple card speaks to summer....time to relax and enjoy this beautiful weather.
I used a stencil for the background, doing a stencil shift technique.

So here's what I did to create my card.
  • I got out the Emblem Mask from A Colorful Life Designs and placed it onto a piece of white cardstock on my Make Art Station.
  • I inked it up with some Tumbled Glass Distress Oxide ink.  
  • I shifted the stencil and inked again with some Peacock Feather DOX ink, filling in the white areas left behind after the first inking.  Fun way to get a different look from using this stencil.
  • Next, I placed the stenciled piece into my Misti and stamped the thistles and the sentiment.
  • I splattered with my black Posca pen just over the thistles.
  • I glued it onto a piece of black cardstock, then onto an A2 card base.


Discount Code for A Colorful Life Designs
(affiliate with no extra cost to you)

Thanks so much for coming by and taking a look.

Adding my card to these challenges:
Craft Rocket- FLOWERS
Aud Sentiments- SUMMER AND SENTIMENT
Allsorts- MAKE YOUR OWN BKG

Supplies
Stamps- Nature Flowers (Art Journey)
Inks- DOX, Versafine Clair
Paper- heavy white (Scribes Nook- Waterloo, Ont.)
Accessories and Tools- stencil- (ACLD); Make Art Station (Ranger); black Posca pen;
TE Blending Brushes; black gems;