Showing posts with label Your Next Stamp. Show all posts

Tuesday, 27 June 2023

Mr. Bubble


Good Morning.
Just a fun card celebrating summer's arrival.
I used a new for June stencil called Mr. Bubble and a new stamp set called Chasing the Sun from A Colorful Life Designs.

So, here's what I did to create my card.
  • I placed a piece of white cardstock onto my Make Art Station and positioned the Mr. Bubble stencil over that. I inked it up with some Salty Ocean Distress Oxide ink.
  • Leaving the stencil in place, I inked the largest bubble with some Uncharted Mariner DOX to bring the highlight to where I wanted to put the little fish.  Without inking my blending brush again, I added some ink in other areas too for some shadowing.
  • Again, leaving the stencil in place, I stamped over it with a splatter stamp using more of the Uncharted Mariner ink. It really added to the look of the bubbles.
  • I splattered with my white Posca pen and set aside to dry.
  • I stamped the fish, die cut it out and coloured it with my Copic markers.  I covered the goggles the fish is wearing with some Nuvo Crystal Glaze to make them look glassy.
  • I placed the stenciled panel into my Misti and stamped the sentiment from the new Chasing the Sun set in the darker area of my card panel.
  • I glued the stenciled panel onto an A2 card panel then used some foam tape to pop up the fish over the sentiment.


Here is the stencil and stamp set I used:


Discount Code for A Colorful Life Designs
(Affiliate with no extra cost to you) 

Thanks for coming by and taking a look.

Adding my card to these challenges:
Make My Monday- ON THE WATER
Simon Says Wed.- VACATION

Supplies
Stamps- Chasing the Sun (ACLD); Mini Snorkel Fun Fishy (Your Next Stamp)
Inks- Versafine Clair; DOX
Paper- heavy white (Scribes Nook- Waterloo, Ont.)
Accessories and Tools- stencil (ACLD); fish die; white Posca pen; 
Misti (My Sweet Petunia); Nuvo Crystal Glaze 

Saturday, 18 April 2020

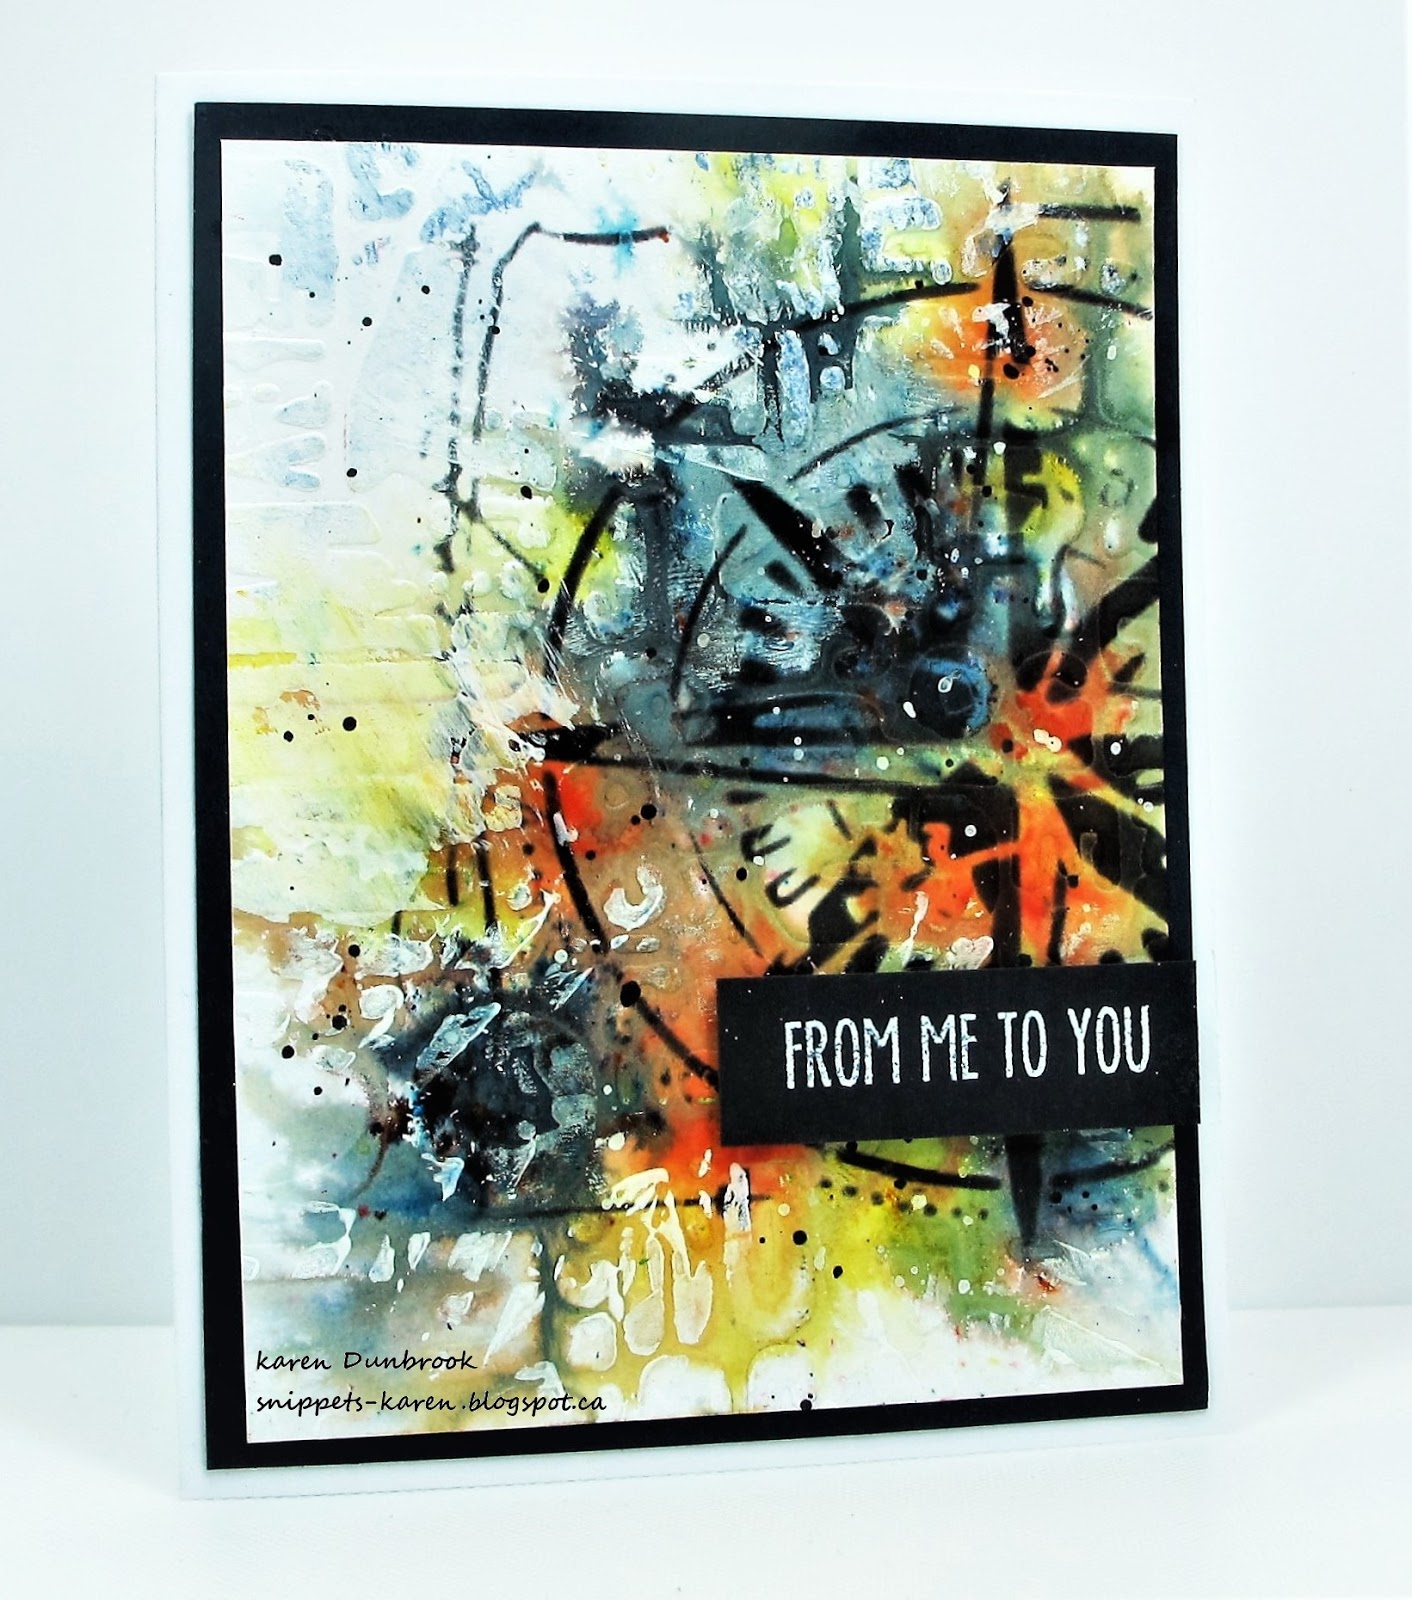
Lead the Way


Hello and Welcome
Today I'm trying my hand at some Mixed Media with this card.  Just playing around is fun.

So here's how my card came to be.
I began with a piece of heavy white cardstock.  I embossed it with my Cuttlebug using a folder from Carabelle Studio.  I think it's called Graffiti but I can't find it at the moment.
* helpful tip:  Lightly spray your paper before placing it inside your embossing folder to get a better impression*
Next, I sprinkled some Brushos onto my embossed card panel, sprayed with just a bit of water and let the colours bloom.  I used some black, lemon and some orange Brushos.  The black is the most amazing as when it is activated with water, you see shades of gray, blue and green.  I dried that with my heat tool. 
When it was all dry, I use the Compass stencil from AAll and Create with some Ranger Archival ink to stencil over to the side of the panel.  Some of the areas looked a bit dark, so I added touches of white acrylic paint using my brayer to lighten them up a bit.  I splattered with some black acrylic paint, then I stamped the sentiment onto a piece of black cardstock, white heat embossed it and pop dotted it over my background.
I glued it over a piece of black cardstock, then onto a white card base.


Thanks so much for coming by and taking a look.

Supplies
Stamps- Everyday Sentiments (YNS)
Inks- Ranger Archival, Brushos, Versamark
Paper- heavy white (Scribes Nook)
Accessories and Tools- EB folder (Carabelle Studios); Compass stencil (AAll Creates);
brayer; pop dots; white eb powder; black and white acrylic paint

Monday, 13 August 2018

Just Swinging By

Hello and Welcome
Here is a simple, fun, cas card I made for one of my little friends.

Here's what I did to create it.
First, I stamped the monkey image using my Misti then used the matching die to cut it out.
I coloured him using my Copic markers which was very simple with this easy image.
Next, I stamped the 'bubble wrap' background using some Peacock Feathers Distress ink and then I pop dotted the monkey over that.
I stamped the Happy Birthday and mounted the whole thing onto a piece of matching brown cardstock.


That's it.  
Thanks so much for coming by and taking a look.

Adding my card to these challenges:
Addicted to CAS- MASCULINE
The Library Challenge- JUNGLE BOOK

Supplies
Stamps- Happy Birthday (Stamping Bella)= Mini Monkey (Your Next Stamp)
Ink- Peacock Feathers Distress (TH)= Tuxedo Black Memento
Paper- heavy white
Accessories and Tools- Misti (My Sweet Petunia); pop dots= Copic markers= Mini Monkey die (YNS)

Thursday, 26 July 2018

Just Swimming By

Hello and Welcome.
Just a fun card I made for one of my little friends that was having a birthday.
Simple card using this cute fish image.

I began by making the background using the 'Splash Watercolour' technique.  I rubbed some Mermaid Lagoon, Peacock Feather and Cracked Pistachio Distress inks onto my non-stick mat, sprayed with water and slapped my paper into the wet ink, drying between layers of ink.
When it was dry, I used the Avery Elle Wonky Stitched die to cut it out.

Next, I stamped the fish from Your Next Stamp using my Misti, die cut it out and watercoloured with more of the Distress inks. I added some Glossy Accents in a heavy layer over the mask on the fish to add some interest and make it look like it was glass.  I pop dot mounted the fish over the background and added it all to a plain white card.


Thanks so much for coming by and taking a look.

Adding my card to these challenges:
Simon Says Wed.- ANYTHING GOES
Addicted to CAS- SUMMERTIME
Time Out- PHOTO INSPIRED

Supplies
Stamps- Mini Snorkel Fun Fishy (Your Next Stamp)= Happy Birthday (Stamping Bella)
Inks- Peacock Feather, Mermaid Lagoon, Cracked Pistachio DI (TH)= Memento Black
Paper- Heavy white (local store)
Accessories and Tools- Glossy Accents (Ranger)= Misti (My Sweet Petunia)= Cuttlebug= pop dots=
Mister (TH)= Non-stick Craft Mat (TH)= Wonky Stitched die (Avery Elle)= Fish die (YNS)

Monday, 14 August 2017

Froggy Wishes

Kids cards....fun and easy.
Here's one I made for a special little girl.

I picked up this adorable frog stamp and die from the last craft show I attended and wanted to use it.
I began by placing the frog inside my Misti and randomly stamped it over my card front.

I stamped it again and using the die, cut it out then coloured it with my Zigs.  
I die cut a circle then stamped the sentiment and glued the coloured frog over that.
Very quick, happy feeling card.


Thanks for coming by and taking a look.

Adding my card to these challenges:
Simon Says Wed.- FOR A CHILD

CASology- SAFARI
CAS on Friday- BIRTHDAY


Supplies
Stamps- Happy Birthday (Studio G); Mini Sticky Note (YNS)
Ink- Tuxedo Black Memento
Paper- heavy white (local store)
Accessories and Tools- Misti; circle die (Spellbinders); frog die (YNS); Copic Markers;
foam dots

Saturday, 24 December 2016

Starry Night


 It's Christmas Eve and what better time to make a starry night sky.
Very simple, last minute card to tuck inside a present.

I used a leftover piece of Brusho inked paper and splattered on some white acrylic paint to look like snow.  I then pop dotted the little village scene die cut from Your Next Stamp over the inked background and stamped the sentiment from MFT. 


 Adding my card to these challenges:

Craft Stamper Magazine- SNOW AND ICE

Southern Girls- ANYTHING GOES

Brown Sugar- CHRISTMAS


 Hope you get to spend a happy, relaxing Christmas Eve with someone you love.

Supplies:  stamp- MFT/ ink- Memento/ white acylic paint/ Brushos/ die- Your Next Stamp/ Cuttlebug


Sunday, 20 November 2016

Peace for the Holidays


Peace.
It's something we all pray for and especially even more now in such turbulent times.  

I made another Christmas card as I get ready for the holidays.
This was a fun one using a leftover piece of Yupo paper I inked with Alcohol inks.
 I began by die-cutting the little village scene onto black cardstock.  This die is from Your Next Stamp and makes for such sweet scenery cards.
I backed it with the inked piece then stamped my sentiment from PTI onto a stitched die-cut piece and pop dot mounted it over to the side.


Adding my card to these challenges:

Shopping Our Stash- FRONT AND CENTER

Craft Stamper Magazine- ANYTHING GOES

Addicted to Stamps- DIE CUTS WITH A STAMP

Love to Create- ANYTHING GOES/MIXED MEDIA


I hope you enjoy a peace filled day!

Supplies:  stamp- PTI/ dies- MFT, Your Next Stamp/ Yupo/ Ranger Alcohol inks/ Cuttlebug/ pop dots/ ink- Memento

Saturday, 1 October 2016

Snowy Village


 I am working on getting some cards made for Christmas.  I wanted to make some more woodgrain background pieces so out came the Elmer's Glue.
For those of you that may have missed it, back in January I did a tutorial about how to create this easy, fun woodgrain paper using Elmers's Glue, a scoring tool and some Distress inks.
To see how to do this go here:

 Next, I die-cut the village using a die from Your Next Stamp and stamped the sentiment from the new Penny Black stamp set called Festive Cheer right onto the panel.
I pop dotted that over the woodgrain background and done.


Adding my card to these challenges:

Simon Says- ANYTHING GOES

Addicted to Stamps and More- HOLIDAY

Craftyhazelnut's Christmas- CHRISTMAS

Fab'n'Funky- CHRISTMAS

Sunny Day Crafting- ANYTHING GOES


Thanks so much for coming by to take a look.

Supplies:  stamps- PB/ ink- Memento, Distress/ die- Your Next Stamp/ Elmer's Glue/ Scor-Pal/ pop dots

Monday, 27 June 2016

Marbled in Red

 Meet my first Christmas card of the year!  

It came about as I am hosting the TLC (technique lovers challenge) at Splitcoast this morning called 
Paper Marbling.

 It is really fun and very easy to do.  

For my card, I marbled the paper using a heavy white cardstock and Copic Re-inkers.  
 When my paper was dry, I die cut the little village and stamped the sentiment from MFT.  Pop dot mounted it onto a white card and done.


Adding my card to these challenges:

CAS on Sunday- BLACK, WHITE and one other colour

Christmas Card Challenge- ANYTHING GOES 

Love to Create- ANYTHING CREATIVE/ MIXED MEDIA

Brown Sugar- ANYTHING GOES

Stampin' Royalty- TO DIE FOR


I hope you get to try this out and thanks for coming by and taking a look.

Supplies:  stamp- MFT/ Copic Re-Inkers/ pan of water/ ink- Memento bl/ Cuttlebug/ die- Your Next Stamp/ pop dots