Showing posts with label Spellbinders. Show all posts

Saturday, 2 October 2021

Oh Christmas Tree


Hello and Welcome
Time is just going by so fast.  
With sweater weather arriving so quickly here where I live, it reminds me that I need to get going on making some more holiday cards.  
So into my stash I went and this is what I came up with.

Here's what I did to create my card.
  • As I went through my stash of inky backgrounds, I found all the practice sheets that I had done on my Gel Plate with acrylic paint while taking a class from Vicki Boutin.  They certainly weren't my favourite so I decided to change that.  I found this one that had blue and green paint on it.  Kind of streaky and not great.  I scratched my head and wondered what to do.  I just picked up a new embossing folder by Spellbinders called Forevergreen and thought I would give it a try.  
  • I placed the painted piece inside the Embossing folder and ran it through my machine a few times to get a good impression.  TIP: Lightly spray your paper with water before embossing to get a better impression.
  • Next, using a small sanding block, I gently rubbed over the raised area to remove some of the blue and green paint. Now to figure out how I would make the details more noticable.
  • I squeezed out a small amount of white acrylic paint onto my non-stick craft mat and using my brayer, I rolled some white paint gently over the top of the sanded areas.  I loved the results.
  • I splattered with more of the white paint that was left on my mat and set aside to dry.
  • I die cut the sentiment from Simon Says from some white cardstock twice and glued them together for stability.
  • When the panel was dry, I glued it onto a piece of green cardstock, then onto a white card base.
  • I glued the sentiment onto the panel, then added some green gems.


I was happy with the results of my card using the embossing folder and this otherwise 'throw away' piece of painted cardstock.
I hope this inspires you to look through your stash and use an otherwise rejected piece.
To see some of my other cards using this technique, go HERE and HERE.

Thanks so much for coming by and taking a look.

Supplies
Stamps- none
Inks- none, Basics Acrylic paint
Paper- white cardstock (Scribes Nook- Waterloo, Ont.)
Accessories and Tools- Forevergreen EB folder (Spellbinders); Speedball Brayer; 
Merry Christmas die (SSS); Spellbinder Platinum die cutting machine; green gems; sanding block

Saturday, 27 June 2020

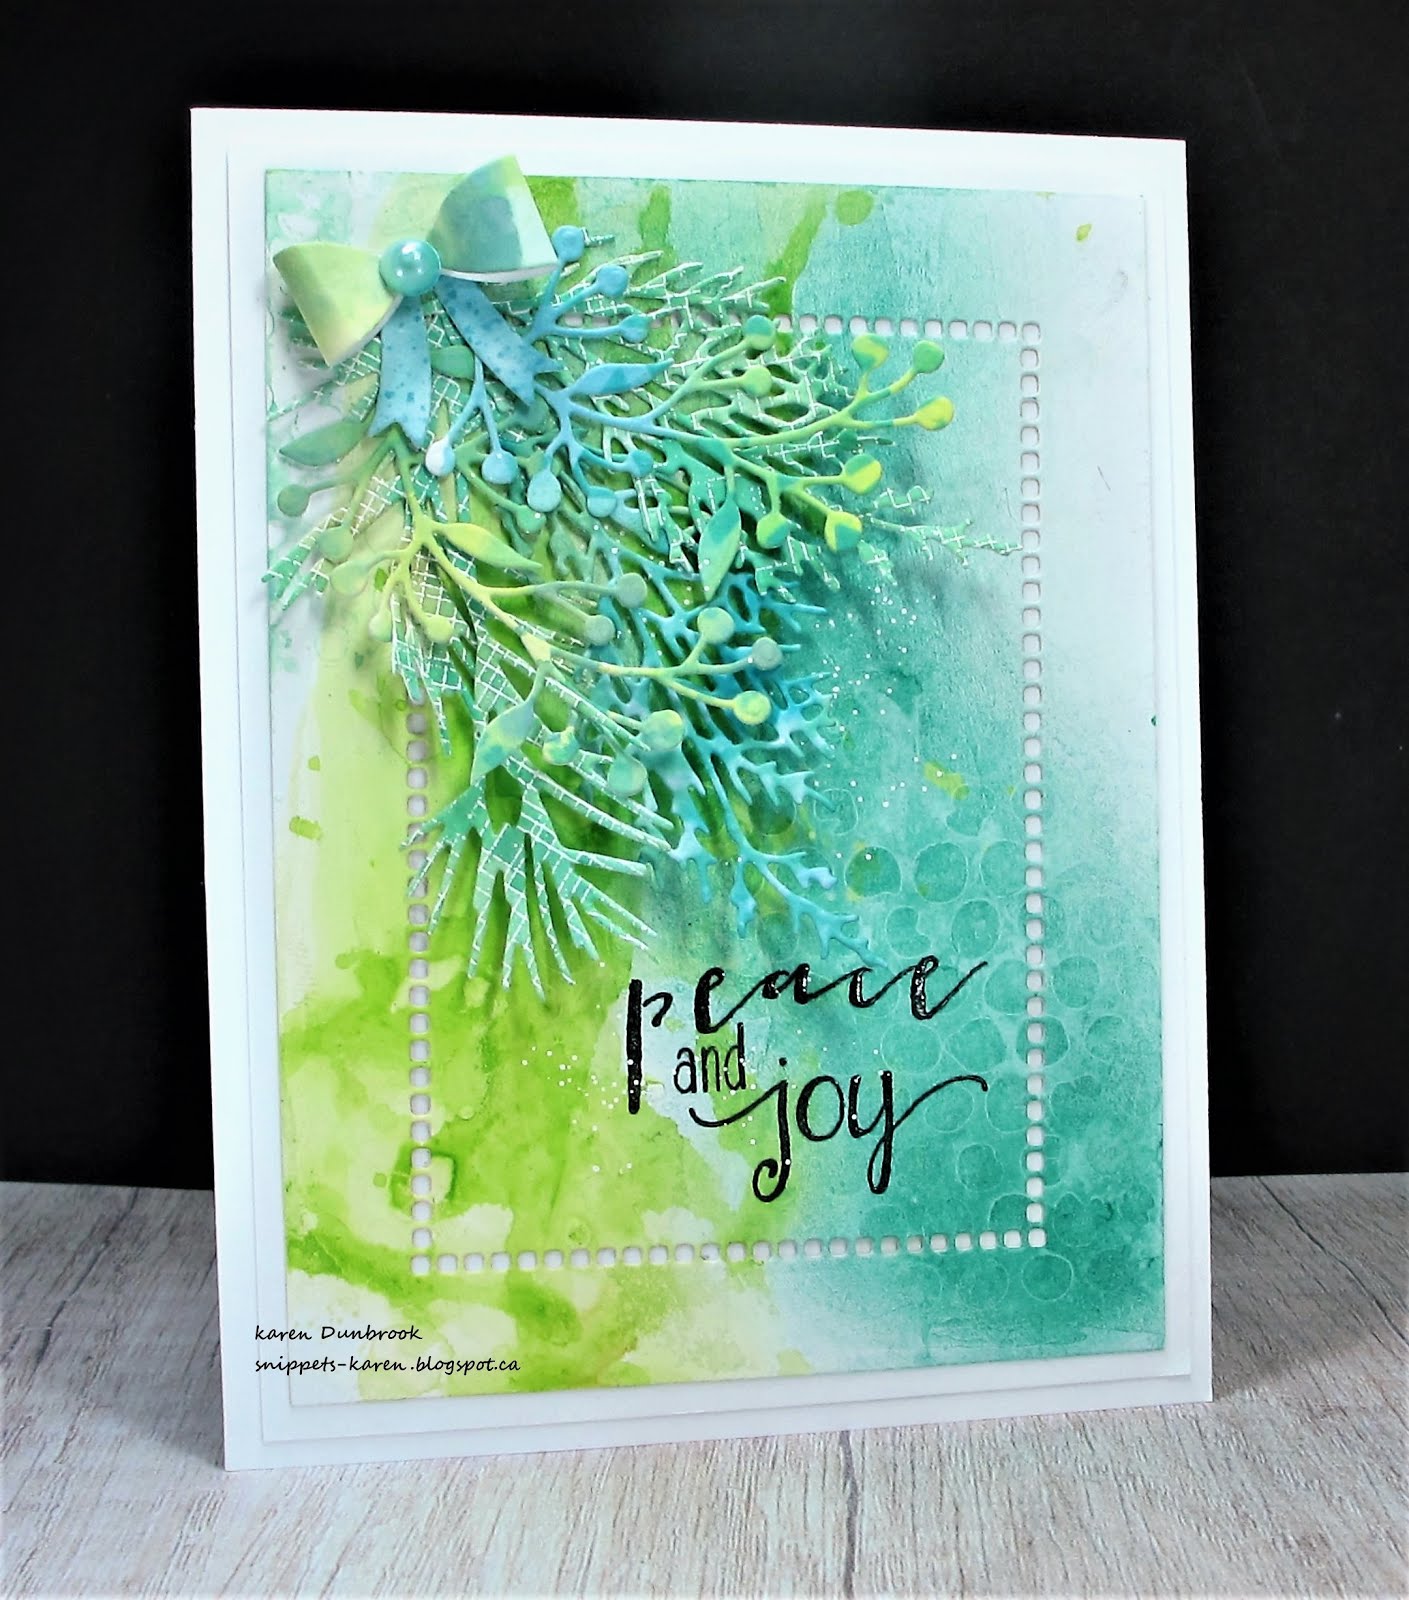
Peace and Joy


Welcome
Meet today's card.
Since I am still not working yet, I've been trying to be productive in my extra time.  I thought it was a good time to start working on a few holiday cards when I heard the guy on the radio said it was 6 months until Christmas.  lol
On another note, I have been watching the Facebook Lives by Vicki Boutin.  I love her fun attitude about creating and 'making magic happen'.  The other night she challenged us to create a background with some blending and watermarking and that is how my background was created. 
If you are interested in seeing any of her 'lives' she posts them all on her FB artist page and also on YouTube.

Here is what the piece looked like:


So onto my card details.
I began with a piece of heavy white cardstock.  I loosely covered it with some Gesso using a palette knife.  Not all the areas are covered, I applied it like I was buttering my toast.  I set that aside and let the whole thing dry.  It dried quickly as the layer of Gesso was pretty thin.  
(you can tell if it's dry when it doesn't feel cool to the touch)
Next, using a piece of acetate, I rubbed some of Vicki's Art Crayons directly onto the acetate, diluted it with water and pressed it onto my panel which you can see on the left hand side.  On the right hand side, I rubbed some VB crayons in blues onto my acetate and without diluting it, I picked up the colour using a stencil brush and rubbed it along the side and up into the green, blending the colours together.
Since the crayons are water soluble, I was able to remove some of the ink with a baby wipe and add some watermarking to the piece using the Messy Dots stencil from A Colorful Life Designs.
I used the Hemstitch die to cut the inner frame then stamped the sentiment from PTI and clear embossed it.
Using a scrap of inky paper, I die-cut the evergreen boughs and glued them at the top.
I finished it off by splattering using my white Posca pen and added the bow at the top of the bough.


Thanks so much for coming by and taking a look.

Adding my card to these challenges:
Simon Says Wed.- ANYTHING GOES
Creative Artiste Mixed Media- ANYTHING GOES
Fab 'n' Funky- CHRISTMAS

Discount Code for A Colorful Life Designs


Supplies
Stamps- Tis the Season (PTI)
Inks- VB Art Crayons; Versafine Clair
Paper- heavy white (Scribes Nook)
Accessories and Tools- Hemstitch die (Spellbinders); Everygreen dies (TH)
Messy Dots stencil (A Colorful Life Designs); sheet of acetate; Mister (TH)

Tuesday, 16 June 2020

Baby Boy

Good Morning
Meet today's card.
A very simple one using a digital image from MelonHeadz….isn't it just the cutest?

So here's what I did to create my card.
I began by printing off the image onto some heavy white card stock.  I cut the piece down to the size I wanted then using my Copic markers, I coloured it in.
I mounted the coloured piece onto a piece of blue cardstock, then onto a piece that I die cut using the Swatches die from Spellbinder.
I took another piece of white cardstock and placed it into my Misti and then stamped the plaid with some Peacock Feathers Distress ink.  I wanted the bkg to match the baby's bib, so using a purple Copic marker, I drew in some lines using a ruler.
I pop dotted the image onto the plaid panel, added 3 buttons under the image and then mounted that all onto a heavy white card base.


Thanks so much for coming by and taking a look.

Supplies
Stamps- Plaid Background(Concord and 9th)
Inks- Copic Markers
Paper- heavy white (Scribes Nook); other- Michaels
Accessories and Tools- printer; buttons; Square Swatches die (Spellbinders); pop dots; ruler

Tuesday, 3 December 2019

Make Memories


Good Morning.
Yesterday over at Splitcoast Stampers, we were challenged to create a card using Snowflakes as the theme and this technique created by Lee aka LuvLee she called Paink for our background.
Since I love to try new techniques, I was ready to try it out.

Here are the instructions she gave:
1. Sponge blue acrylic paint lightly on cardstock
2. Spritz blue ink refill lightly and brush (I drizzled evenly)
3. Drizzle blending solution, brush then set with heat tool


Lee's card was a blue base and since blue works great with snowflakes, I decided to make mine blue too (big surprise eh?).  I followed her instructions and my card came together easily.
I began by sponging on some blue acrylic paint, then I filled up a small spritzer bottle with diluted re-inker and sprayed some over the sponged bkg.  I dried that, then drizzled on the Blending Solution.  I added an extra step, I splattered the piece with white acrylic paint to look like snow.

I dried the piece then die cut out the dots.  I then placed it into my Misti and stamped the large snowflake from Tim Holtz in the corner using some Versamark ink and white heat embossed it.
I did the same with the smaller snowflakes from MFT.
Lastly, I stamped in the sentiment, added the black dots and then simply mounted it onto a heavy white card base.


Thanks so much for coming by and taking a look.

Adding my card to these challenges:
Simon Says Stamp- ANYTHING GOES
CAS on Fridays- BLACK, WHITE AND ONE OTHER COLOR
Shopping Our Stash- HAPPY HOLIDAYS
Use Your Stuff- SNOW

Supplies
Stamps- Lg Snowflake (TH); Snowflakes (MFT); Being Unique (TT)
Inks- Versafine Clair Noir; Versamark; Blueprint Sketch Distress re-inker (TH)
Paper- heavy white (Scribes Nook)
Accessories and Tools- Hemstitch die (Spellbinders); white and blue acrylic paint; sponge;
Blending Solution; paint brush; white eb powder; black dots