Saturday, 20 May 2023

Just Imagine- Use Your Stencil as a Stamp


Welcome
Today's card features the newly released Star Stretch stencil from A Colorful Life Designs.
I tried a new technique for this card and was pleased with the results as it gave a muted background.

So, here's what I did to create my card.
  • I got out a piece of white cardstock and my Star Stretch stencil.  I also got out a solid background stamp from Hero Arts called Paint Swatches.  You have to use a solid stamp for this technique.
  • Next, I inked up the solid stamp with some Uncharted Mariner Distress Oxide ink and pressed the stamp onto the Star Stretch stencil to pick up the pattern and stamped that onto my white cardstock.
  • I repeated that process until the whole panel was covered.
  • I placed the stenciled panel into my Misti and stamped the flowers to one side and the sentiment near the top.  I did heat emboss them to help make them pop.
  • I glued the finished panel onto a piece of black cardstock, then onto blue and then onto an A2 sized card base.
  • I added 3 black gems around the sentiment.

Here is the stencil I used:
Star Stretch

Discount Code for A Colorful Life Designs
(Affiliate with no extra cost to you) 

Thanks so much for coming by and taking a look.

Adding my card to these challenges:
Stamping Sensations- STENCIL AND STAMPING
Cardz 4 Galz- BACKGROUNDS
Bastel-traum- PLANTS/FLOWERS

Supplies
Stamps- Just Be Happy (Visible Image); Clover Silhouette (Magenta); Paint Swatches (HA)
Inks- Versafine Clair; DOX
Paper- Scribes Nook- Waterloo, Ont.
Accessories and Tools- stencil- ACLD; Make Art station (Ranger); Misti (My Sweet Petunia);
clear EB powder

Friday, 19 May 2023

Wanted to say Hello


Good Morning
Today's card was a fun one using a new stencil for May called Orbits and combined with an older stencil called Dotted Wreath.  
It made for a Clean and Simple card.

So, here's what I did to create my card.
  • I placed a piece of white cardstock onto my Make Art Station and positioned one part of the Orbits stencil over my paper, centering it.  I inked it up with some Uncharted Mariners Distress Oxide ink.
  • I moved the stencil and added one of the smaller rings and inked that up with some Peacock Feathers Distress Oxide ink right into the center part.
  • Next, I removed the Orbits stencil and I placed the Dotted Wreath stencil over the background and inked that up with some more Peacock Feathers DOX ink.
  • I die cut the "Hello' from some blue cardstock and the shadow of the die from white and glued them together, then popped that into the center of the circles.
  • I glued the panel onto a piece of matching blue cardstock, then onto an A2 sized card base.

Here are the stencils I used:


Discount Code for A Colorful Life Designs
(Affiliate with no extra cost to you) 

Thanks so much for coming by and taking a look.

Adding my card to these challenges:
Crafty Addicts- ANYTHING GOES
Addicted to CAS- MONOCHROME
Challenge Up Your Life= CLEAN AND SIMPLE

Supplies
Stamp- none
Ink- DOX
Paper- Scribes Nook- Waterloo, Ont.
Accessories and Tools- stencils (ACLD); Make Art Station (Ranger); 
TE Blending Brushes; Hello die (SSS); foam tape

Tuesday, 16 May 2023

I Will Be With You

Good Morning
Meet today's card featuring this exciting new Layered Squares Mandela stencil from A Colorful Life Designs.  
It sure is a fun one to play with and comes with 3 layering stencils to use together or by themselves...so many possibilities.  I decided to use just 2 of the stencils together for my card.

So, here's what I did to create my card.
  • I placed a piece of white cardstock onto my Make Art Station and positioned the Layered Squares Mandela stencil Part #1 over my cardstock and inked that up with some Seedless Preserves Distress Oxide ink.
  • I removed that stencil and replaced it with Stencil #2 of that set but this time, I used a baby wipe and some Villainous Potion DOX ink to apply the colour.  Just rub some ink onto a piece of acetate and pick up the colour with the wipe.  It gives such a different effect and look to the inking.
  • Next, I removed the stencil and to add more interest, I splattered with my white Posca pen.
  • I placed the stenciled panel into my Misti and stamped the sentiment into the corner and clear heat embossed it.
  • I glued the piece onto some pale purple cardstock, then onto and A2 card base.

Here is the stencil I used:


Discount Code for A Colorful Life Designs
(Affiliate with no extra cost to you) 

Thanks so very much for the visit.

Adding my card to these challenges:
Simon Says Wed.- STENCIL IT
Crazy is Our Fame- Stencils are our Game- STENCIL with option FLOWERS

Supplies
Stamp- Darkness Stars (Impression Obsession RETIRED)
Inks- Versafine Clair; DOX
Paper- Scribes Nook- Waterloo, Ont.
Accessories and Tools- stencils (ACLD); Make Art Station (Ranger); baby wipes;
Misti, white Posca pen; clear embossing powder; TE Blending Brushes

Monday, 15 May 2023

Star Points


Welcome
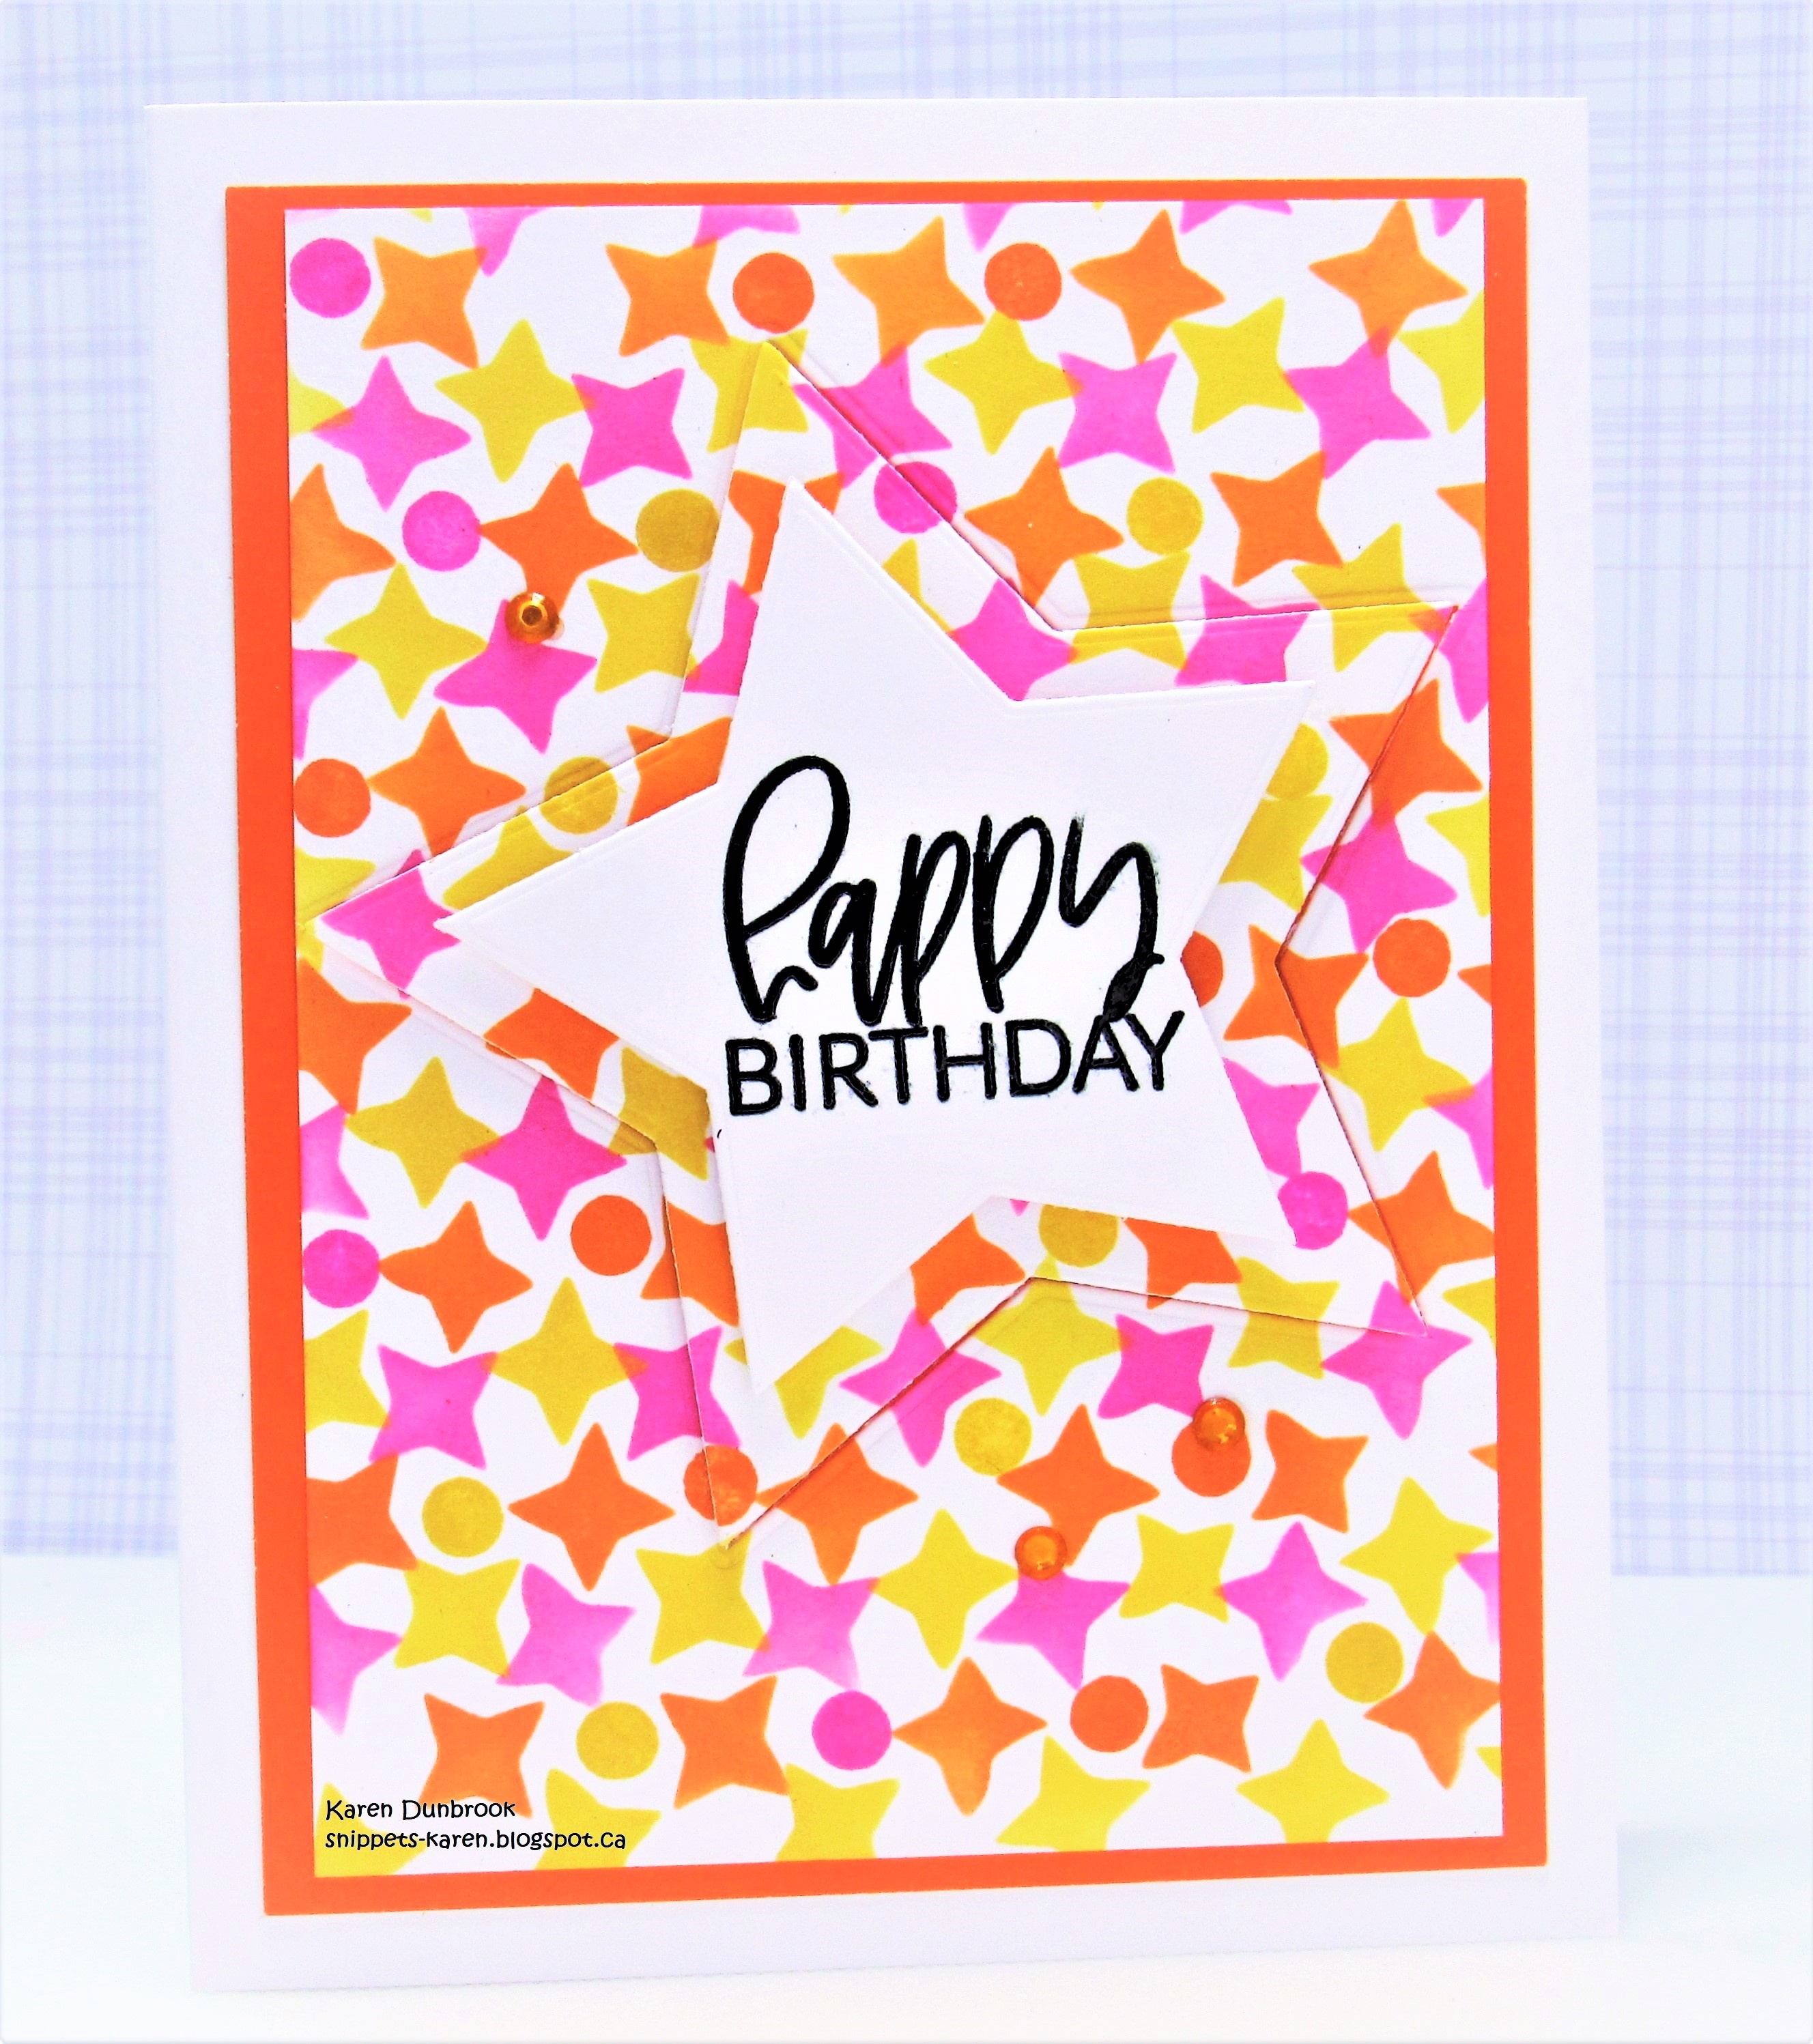
Meet today's card using one of the new May released stencils called Star Points from A Colorful Life Designs.
I created an overall pattern by doing some stencil shifting.

So, here's what I did to create my card.
  • I placed the Star Points stencil over a piece of white cardstock on my Make Art Station and then inked it up with some Picked Raspberry Distress Oxide ink.
  • I cleaned off the stencil and moved it over to an open area and inked again with some Mustard Seed DOX ink.  
  • I repeated the above process again and inked lastly with some Ripe Persimmon DOX ink.
  • To help fill the panel and make the pattern look a bit more cohesive, I used an eraser on the end of a pencil, to fill in the open areas using the same colours I used on the stars.  
  • I took the panel and cut out a star from the center.
  • I cut another star from some white cardstock, placed it into my Misti and stamped the sentiment.
  • I glued the stenciled panel onto a piece of orange cardstock, then onto an A2 sized card base.
  • I popped the star back into place, matching up the patterns with some foam tape.
  • Finally, I glued the smaller white star on top of the larger one.

Here is the stencil I used:

Discount Code for A Colorful Life Designs
(Affiliate with no extra cost to you) 

Thanks so much for taking a look.

Adding my card to these challenges:
We Love Stamping- ANYTHING STAMPED-OPTION< IN THE GARDEN
Stamping Sensations- ANYTHING STAMPED- OPTION STENCIL


Supplies
Stamp- Everyday Circle Tags (Avery Elle)
Inks- Versafine Clair; DOX
Paper- Scribes Nook- Waterloo, Ont.
Accessories and Tools- stencil (ACLD); Make Art Station (Ranger); 
TE Blending Brushes; pencil eraser

Saturday, 13 May 2023

Split Circle


Good Morning
Meet the May newly released Split Circle stencil from A Colorful Life Designs.
Lots of different ways to use this one.

So here's what I did to create my card.
  • I cut a piece of white cardstock and positioned the Split Circle stencil over that on my Make Art Station, tilting the whole stencil to one side.  I inked up over the stencil with some Shaded Lilac Distress Oxide ink.
  • Next, leaving the stencil in place, I positioned the Spring Foliage stencil over that and inked with some Villainous Potion DOX ink.  Layering the 2 stencils gave such a fun looking background.
  • I splattered with my white Posca pen and let dry.
  • When the panel was dry, I placed it into my Misti to stamp the sentiment from Hero Arts.
  • I glued the piece onto some white cardstock, then purple, then onto an A2 sized card base.
  • I added 3 black gems around the sentiment.

Here are the stencils I used:


Discount Code for A Colorful Life Designs
(Affiliate with no extra cost to you) 

Thanks so much for coming by and taking a look.

Adding my card to these challenges:
Simon Says Stamp- STENCIL IT
My Time to Craft- MONOCHROMATIC
Addicted to Stamps and More- DIE CUTS and/or STENCIL

Supplies
Stamp- Huge Hugs (HA)
Inks- Versafine Clair; DOX
Paper- Scribes Nook- Waterloo, Ont.
Accessories and Tools- stencils (ACLD); white Posca pen; Blending Brushes (TE)
Make Art Station (Ranger); Misti (My Sweet Petunia)

Saturday, 6 May 2023

Sending Happy Thoughts Your Way

Good Morning and Happy Saturday!
Today, I'm playing with 2 new stencils from A Colorful Life Designs called Air Jaunt and Classic Travel.
I paired these 2 stencils with each other to create a simple CAS card.

So, here's what I did to create my card.
  • I placed a piece of white cardstock onto my Make Art Station and positioned one of the elements of the Classic Travel stencil over my paper, centering it.  This stencil has 3 different element on it as you can see below.
  • Next, I inked it up with some Peacock Feathers Distress Oxide ink and a hint of some Uncharted Mariner DOX ink to add some shadowing.
  • I removed that stencil and positioned the Air Jaunt stencil around the earth image and inked that with some more Uncharted Mariners DOX ink.
  • I removed the stencil and placed the panel into my Misti to stamp the sentiment from Simon Says Stamp.
  • I glued the panel onto a piece of blue cardstock, then onto an A2 sized card base.

Here are the stencils I used:
Classic Travel


Discount Code for A Colorful Life Designs
(Affiliate with no extra cost to you) 

Thanks so much for coming by and taking a look.

Adding my card to these challenges:
Simon Says Wed.- NO PATTERNED PAPER
AAA Cards- PICK A SIDE- HOT OR COLD COLOR SCHEME
(cold)

Supplies
Stamp=Happy Thoughts (SSS)
Inks- Versafine Clair; DOX
Paper- Scribes Nook- Waterloo, Ont.
Accessories and Tools- stencils (ACLD); Misti; TE Blending Brushes

Thursday, 4 May 2023

Layered Solar System


Welcome
How about some space fun using the newly released Layered Solar System stencil from A Colorful Life Designs.
I guess it's Star Wars Day today so perfect timing for my card.

So, here's what I did to create my card.
  • I began by placing a piece of white cardstock onto my Make Art Station. I positioned Part #1 of the Layered Solar System stencil over my cardstock and inked it up with some Blueprint Sketch Distress Oxide ink.
  • I removed that stencil and positioned the Part #2 stencil (this adds the details to the planets) and inked that up with some Peacock Feathers Distress Oxide ink.  I wanted to add a bit of shading to the planets, so I inked over them in places with some Salvaged Patina DOX ink.
  • I removed the stencil and splattered with my white Posca pen.
  • When it was all dry, I stamped the sentiment into the middle area.
  • I glued the finished panel onto a piece of blue cardstock, then onto an A2 sized card base.

Here is the 2-Part stencil I used:

Discount Code for A Colorful Life Designs
(Affiliate with no extra cost to you) 

Thanks so much for coming by and taking a look.

Adding my card to these challenges:
Simon Says Wed.- NO PATTERNED PAPER
The Crafty Addicts- ANYTHING GOES
Addicted to Stamps and More- DIE CUTS and/or STENCILS

Supplies
Stamp- The Sky is the Limit (SU)
Inks- Versafine Clair, DOX
Paper- Scribes Nook- Waterloo, Ont.
Accessories and Tools- stencils (ACLD); TE Blending Brushes; Make Art Station (Ranger);
white Posca pen; Misti (My Sweet Petunia)